Navigating Brand Expand
Dashboard
The Dashboard serves as the main page for the Brand Expand account. On the left side, you will find the navigation, a summary of the total number of products, launches, and orders. Clicking "view more" will take you to the detailed lists of your products, launches, and orders. On the right side, there is a "product tour" section. These interactive tours provide step-by-step guidance on using Brand Expand. Just choose the feature you want to explore and follow the instructions accordingly.
Lastly, every page of our software includes a live chat function that allows clients to speak with a customer service representative in real time for quick assistance.

Products
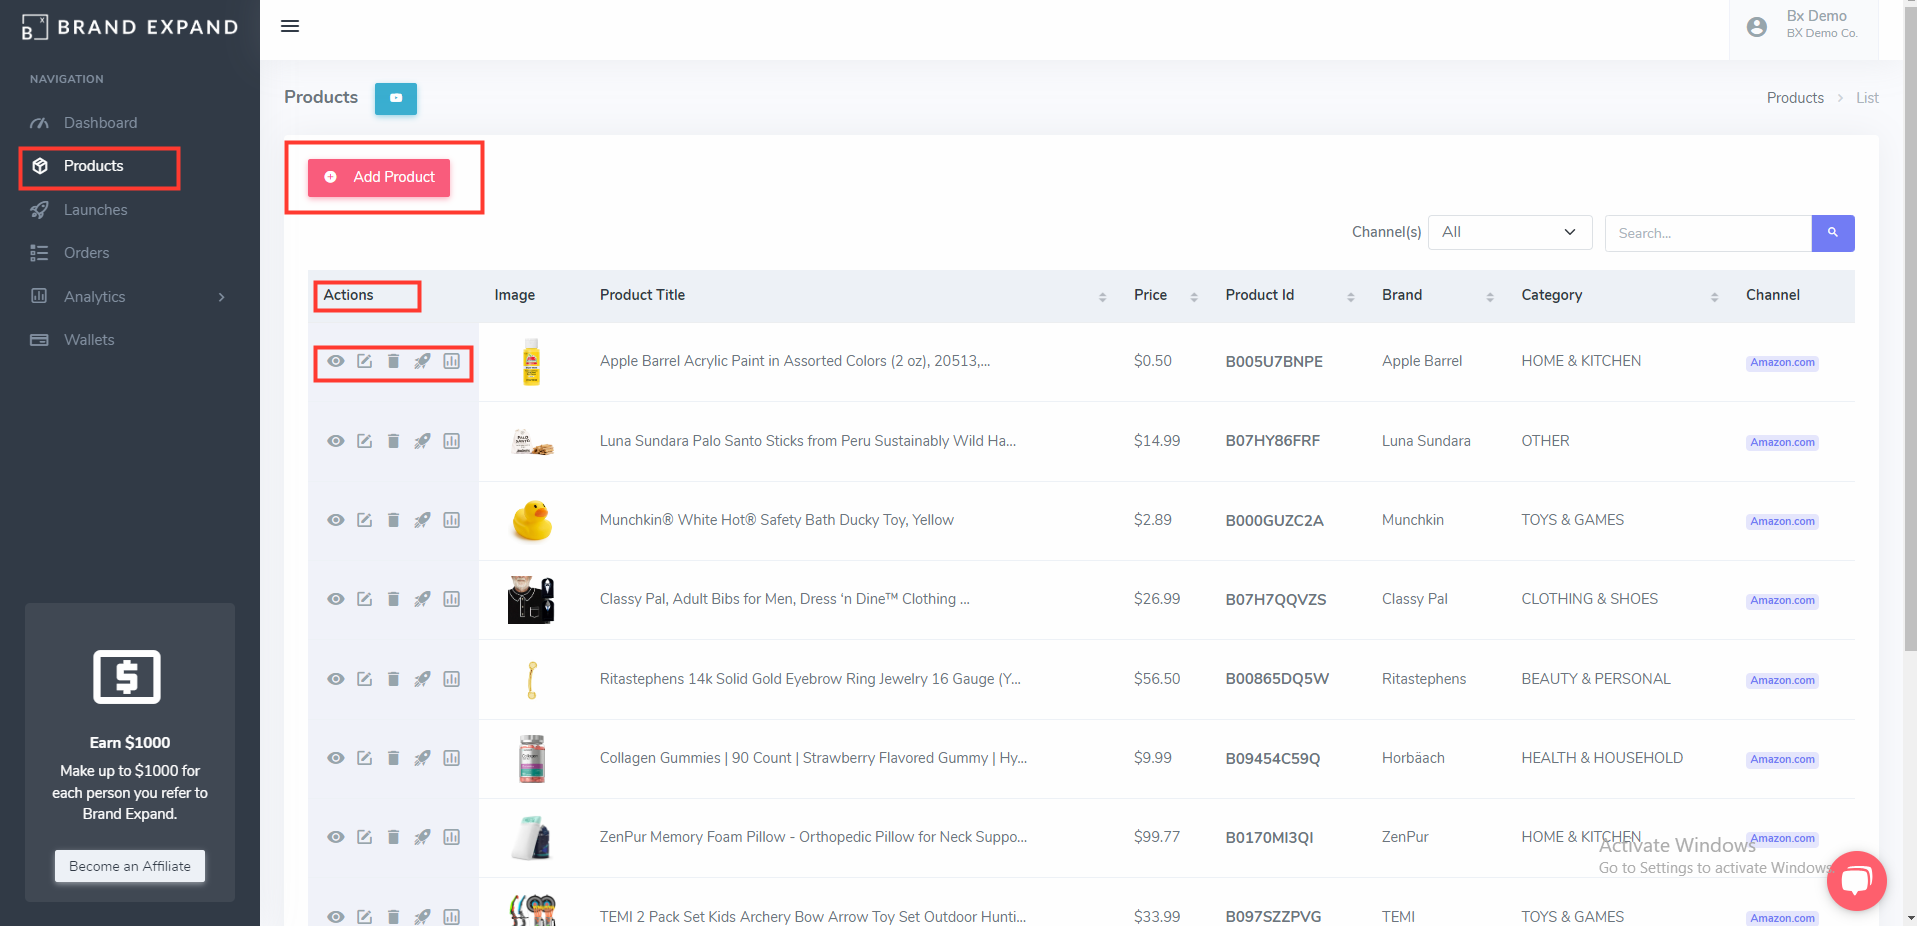
"Products" is the page where you can add products to your Brand Expand account by clicking on "Add Product", located in the upper right corner.
It also displays a list of the products you have added, along with their respective images, product titles, prices, product IDs, brands, categories, and channels.
Below "Actions", you will find various icons that allow you to perform actions such as viewing, editing, deleting, launching, and tracking your products.
Launches
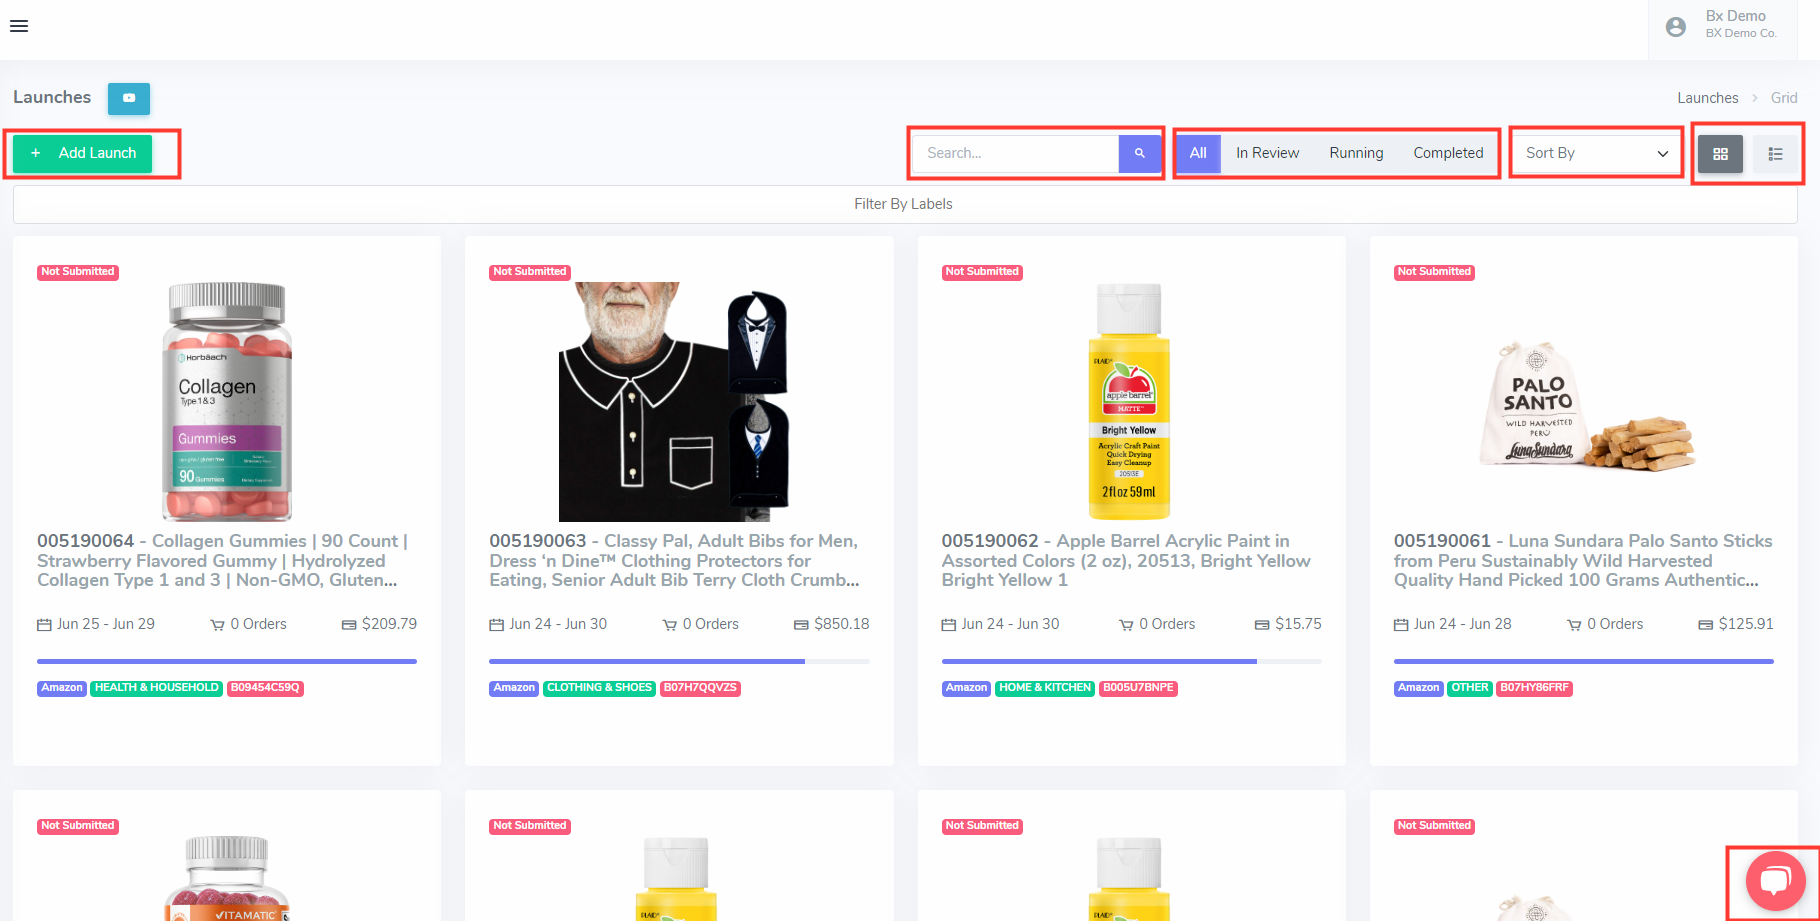
Here in "Launches," you will find the list of the launches you have created. To add a new launch to the list, simply click on the "Add Launch" button. If you need to locate a specific launch, you can use the search box by entering the launch number and clicking on the search button.
For better organization, you have the option to sort your launches using the "Sort By" feature. Furthermore, you can customize the display style of the launches by clicking on the two icons located in the top right corner of the screen. Choose between the Grid and List options based on your preference.
To refine your searches and narrow down the results, you can hover your mouse over the options for "In Review," "Pending," and "Completed."
Orders
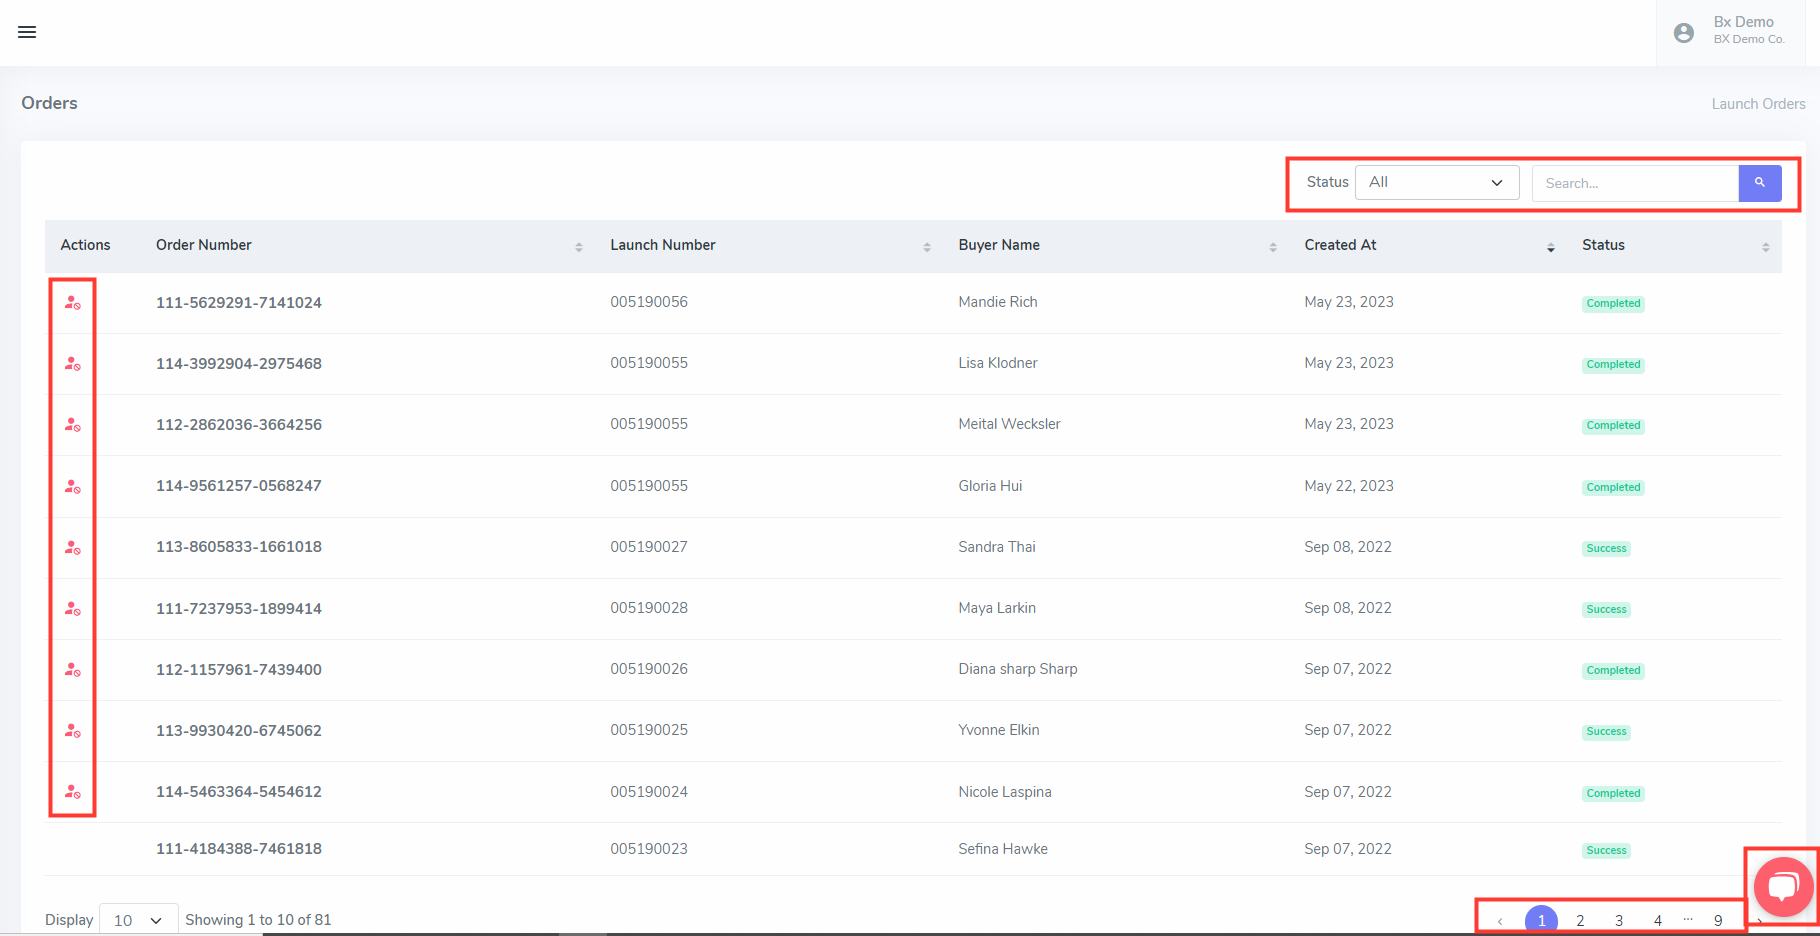
The "Orders" page displays a comprehensive list of all orders associated with the launches you have created. It provides essential information about each order, including order numbers, launch numbers, buyer names, creation dates, and order statuses.
Under the "Actions" section, you have the option to blacklist users who abuse the platform by clicking on the red icon. Additionally, you can modify the order status by selecting the appropriate option located in the top right corner of the screen. This allows you to filter orders based on approval needed, completed, cancelled, pending, and success.
To search for a specific order, simply enter the order number in the search box and click on the search button.
Analytics
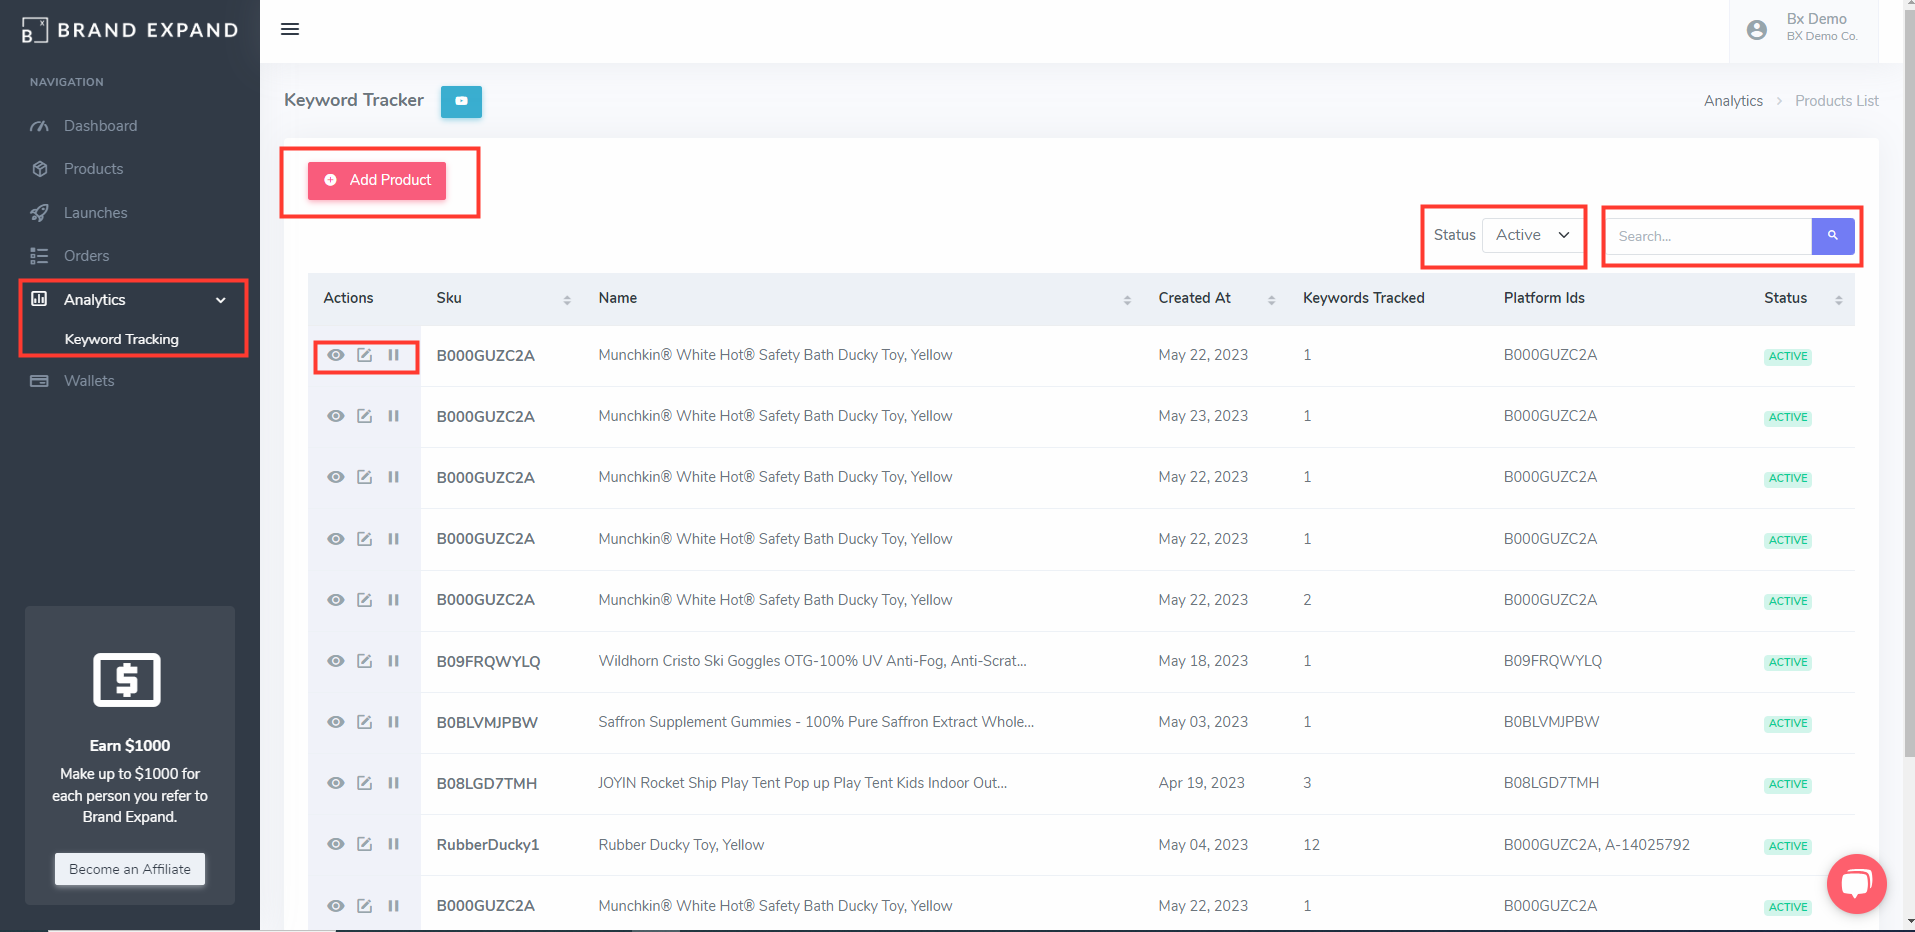
Paid subscriptions unlock the keyword tracking feature, allowing you to monitor your keyword rank over the course of your launch and beyond.
All keywords stop tracking at rank 250, so if sellers do not see results it’s because they are not in the top 250 keyword rankings.
Head to your Analytics tab in your account and select Keyword Tracking. From here, you will see a list of all the current tracking we are keeping an eye on for you. You can hit the RED ADD PRODUCT button at the top of this list and add your Product ID/ASIN and the keywords you would like to see the rank for. Hit Save and the tracking will begin.
Then you are free to visit this tab any time you would like to see the data for a particular product.
Wallet
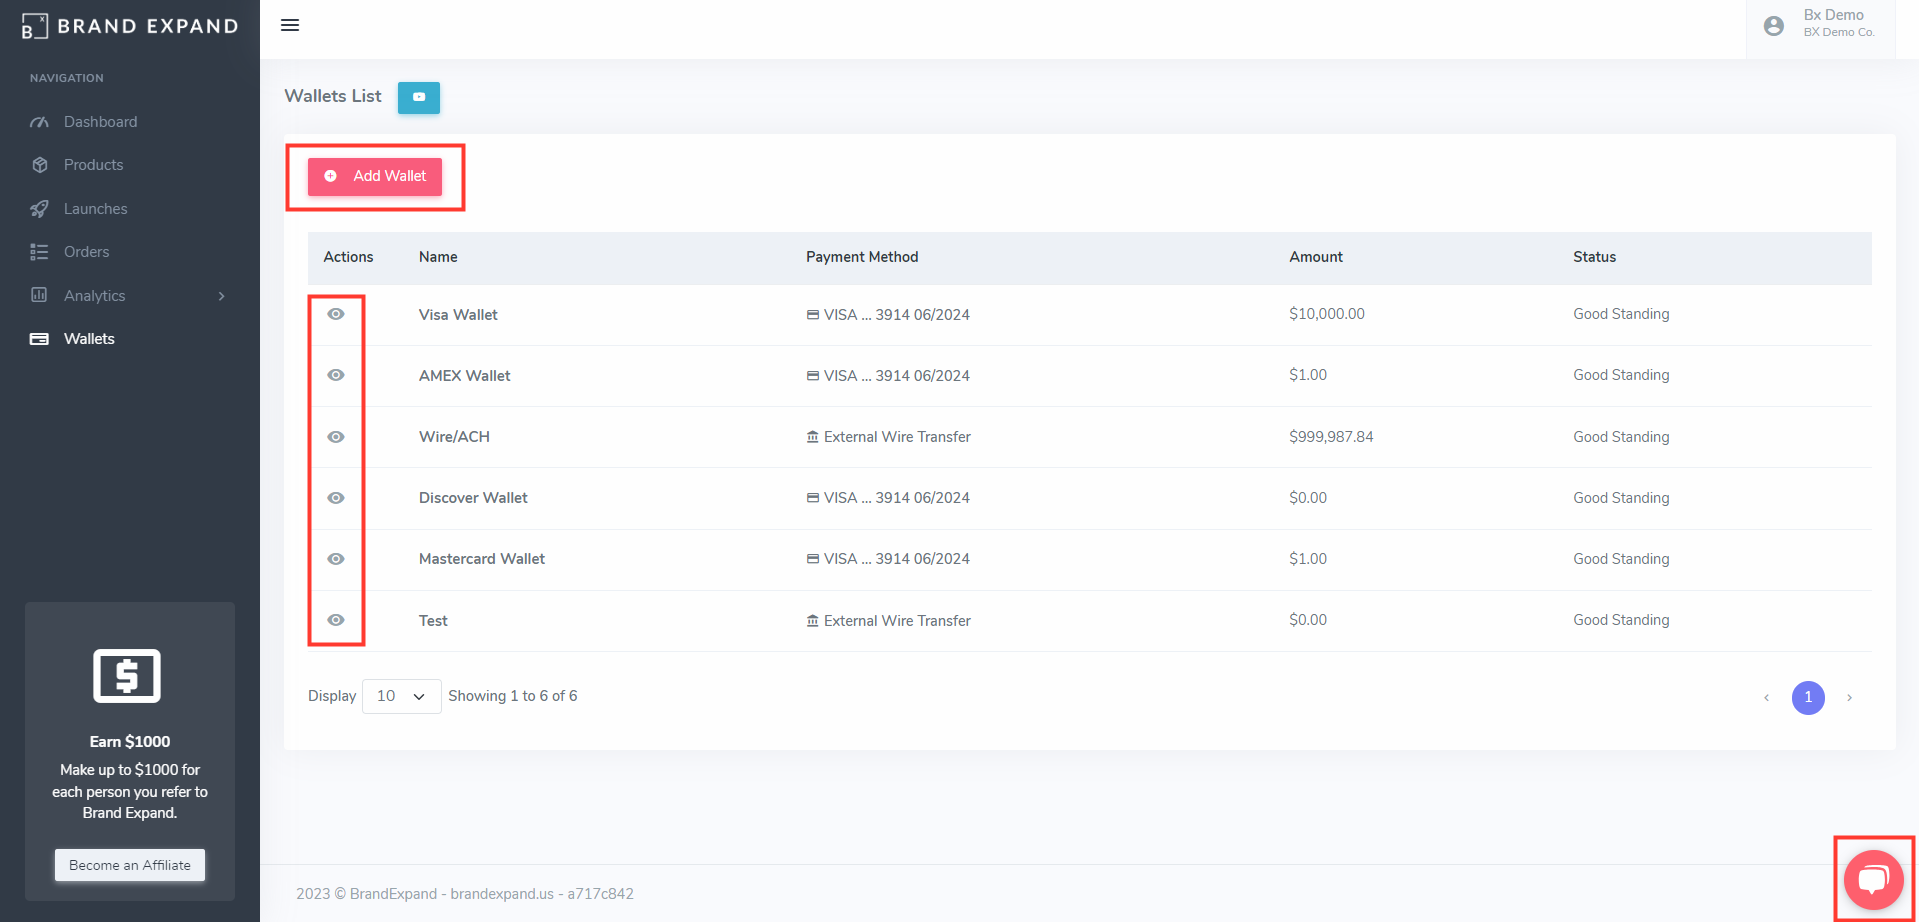
The wallet is where funds are drawn from for the duration of product launches. You will be able to see the wallet details and transactions by clicking the View eye icon under actions.
Sellers have the option to create multiple wallets that can be backed by different payment methods. This feature allows you to separate launch costs between different wallets that can be tied directly to different companies and products, or other financial purposes. When sellers have multiple wallets, they will be given the option to choose which wallet to associate with launches during launch submission.
My Account
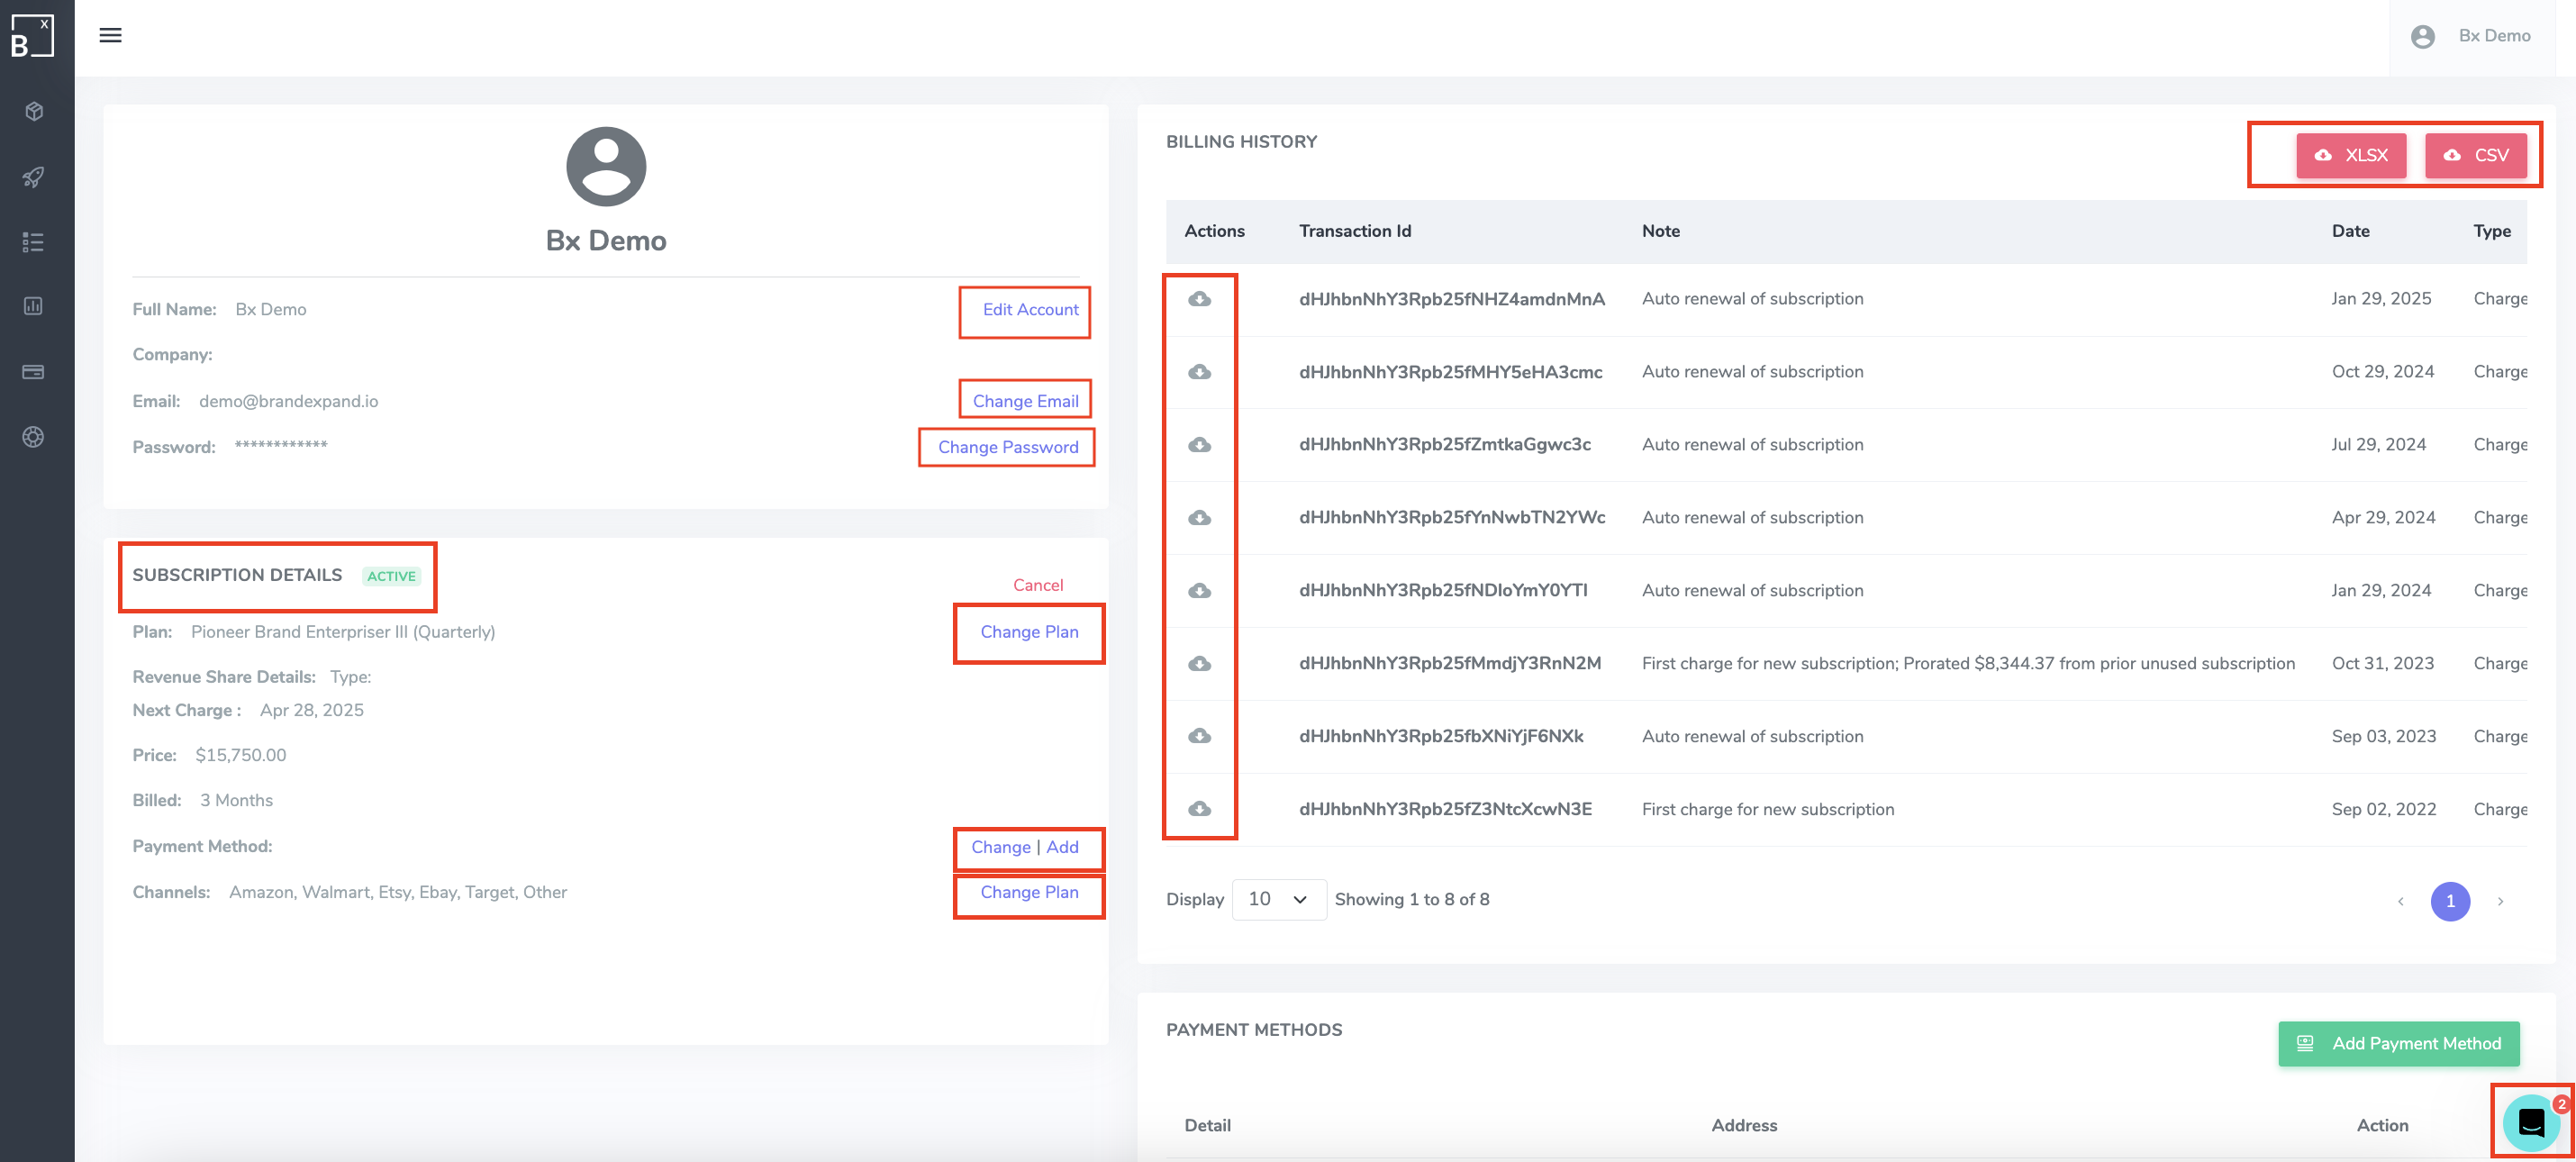
On the "My Account" page, you will find the left side dedicated to viewing and editing your account details. Here, you can make changes to your email and password. Additionally, you can access your subscription details, giving you the ability to upgrade your plan or manage your payment methods.
On the right side of the page, you can review your billing history. By clicking on the cloud icon under the "Actions" section, you can view receipts. To download your billing transactions, simply click on the red XLSV or CSV button.
As you scroll down the "My Account" page, you will come across the sections for blacklisted buyers and payment methods.

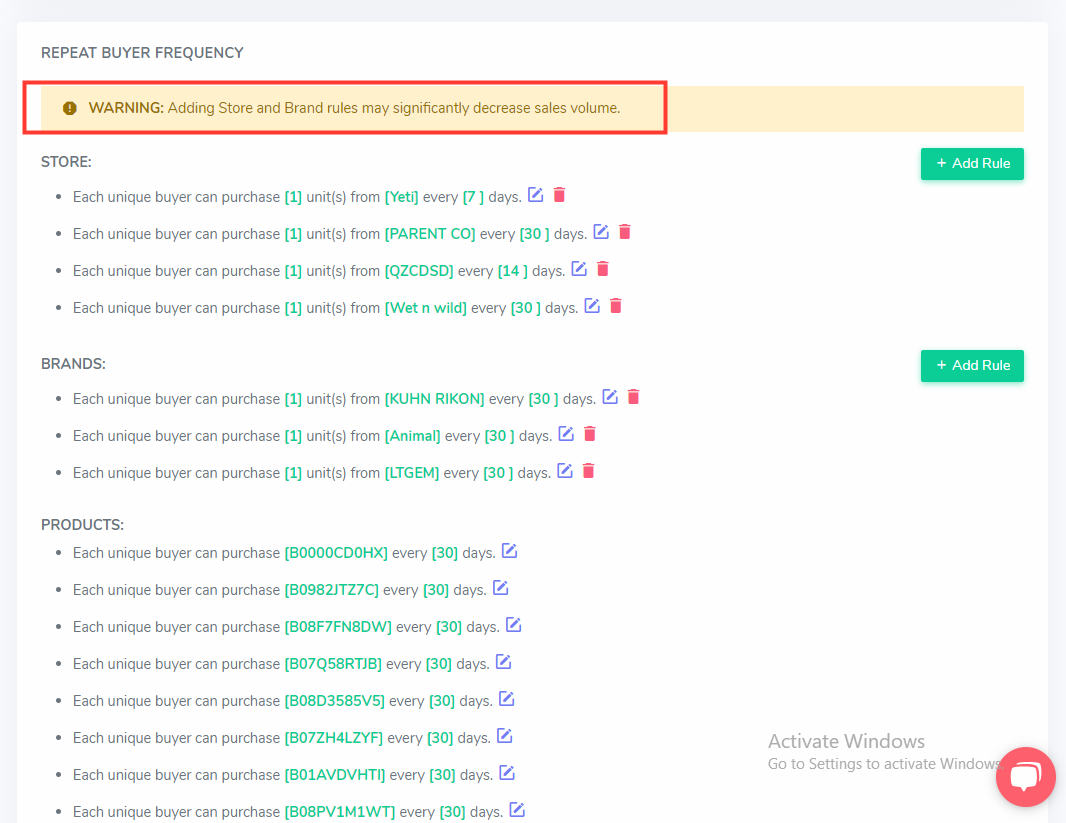
Within the Repeat Buyer Frequency feature, you can establish rules for your campaigns on a product, brand, and store level. This function enables you to specify the number of days that must pass before a buyer from our network can purchase again.
.png?width=3240&height=752&name=BrandExpandLogo-11%20(Main).png)