.png?width=3240&height=752&name=BrandExpandLogo-11%20(Main).png)
How To Set Up an Organic Launch
Follow these steps to set up an Organic Launch in Brand Expand.
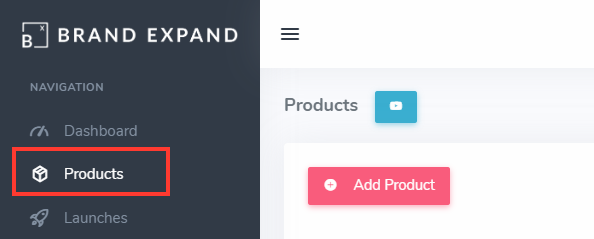
STEP 1
Login to your account and navigate to the products page.
STEP 2
Choose the product that you want to launch then click on the "Launch Product" (the rocket ship icon) under Actions.

STEP 3
Click Start Launch under the "Organic Launch" option.

STEP 4
On the Product Setup page, you will review and add all the necessary product details following the automated system review.
When the system identifies an error with your offer (Sold By), a prompt will appear for your review. Click "acknowledge" to examine the error.

Please review all fields except for Product ID, title, and launch platform, as these are not editable. For additional details, please refer to the information below:

Launch Exposure - Select your target audience for your listing.
-
Public Launch: Your product is visible to all buyers in the network, including experienced and new customers.
-
Private Launch: Targets only buyers with prior purchases on the deal site.
- Shipping (coming soon!) - The additional per unit shipping amount you want to cover.
- Customers Can Click Sponsored Ads - Check this box to let customers find your product through sponsored ads if needed. This is often due to the product not yet indexing organically. Note: The increased visibility does not guarantee sales or prevent ad use if left unchecked.
-
Customer Can Apply Coupon: It is up to you if you want the buyers to use a coupon that is public on your listing when purchasing your product. Allowing buyers to apply a coupon does offer an organic customer experience and can bring down your launch campaign cost.
-
ACoS (Discount) - ACoS (Advertising Cost of Sales) represents part of the cost of generating sales and receiving buyer feedback. For example, with an 80% ACoS for a $10 product, you're willing to spend $8 on advertising per sale. Generally speaking, a higher ACoS often leads to increased sales volume.
Note: To facilitate the transaction and feedback, a small percentage of this cost may be allocated to a buyer surcharge fee, reducing the final amount received by the buyer.
Once done, click "Next".
STEP 5
On Launch Timeline, select a start date and choose your maximum desired units for the launch campaign.
-
Custom: Creates a fully customizable number of daily promotions.
-
Linear: Creates a linear, evenly distributed line of promotions based on starting and ending promotions.
-
Normal: Creates a normal distribution curve based on first-day and mid-launch promotions.
-
Uniform: Creates an even number of daily promotions.
Once promotions are entered, select Evergreen (if applicable and desired) and input your preferred number of days and units per day. The Evergreen launch drive sales after your campaign ends at a 50% discount on revenue share. Only available on paid plans.
Note: If you submit a launch with Evergreen enabled, it cannot be edited once it reaches the evergreen phase.

Once done, click "Next".
STEP 6
The "Destination" page indicates how buyers will find your product. Choose between the following options:
-
Organic: Keep your default title or modify it to include several relevant long-tail keywords. Buyers will be instructed to use 2-5 keywords of their choosing to find your product.
-
Link: Keep your direct link or enter another link of your choice.
Once done, click on "Next".

STEP 7
On the Wallets step, you can select a wallet to use for the launch. If you manage multiple brands and want to separate charges, you can add a new wallet for each brand.

💡 Save on fees! Prefund your launch to avoid the additional pay-as-you-go charges.
Once done, click on "Next".
STEP 8
On the Checkout page, you'll see a price breakdown, a campaign review that will alert you of any issues, notes section, and terms of use.


For Amazon launches:
Automated launch approvals: If the system review detects no discrepancies in your launch setup, a message will appear indicating that your launch is eligible for automated approval.

Manual launch review: If an internal note is added or any discrepancies are detected, a prompt will appear in the campaign review section, requiring manual review from our Success team.

For all other marketplace launches:
For all other marketplace launches, your launch campaign will be submitted for manual review by our team. A prompt will display stating:

STEP 9
Please review our terms of service and click the checkbox.

Once you submit your launch, it will be reviewed by the Success team.
Additional Information
-
You can also launch from the Launches page by clicking "Add Launch" then selecting the product you'd like to launch.
-
Once launches are submitted for manual review, our staff thoroughly reviews them to make sure each launch is set up for success. See our business hours here.
-
Not sure what your most important keywords are for your listing and goals? Ask our staff to provide a Keyword Audit showing traffic and sales from your top 25 most relevant keywords. Only available for paid subscriptions.
-
Additional questions? Use our chat feature in the software for priority responses.